There’s something satisfying about building something with your own hands. Especially when it ends up being useful and stylish. DIY wood shelving checks both boxes. Whether you’re organizing the garage, sprucing up your living room with floating shelves, or finally giving the basement some structure, this guide walks you through everything you need to know to make it happen. No experience necessary. Just a little time, a few tools, and the willingness to measure twice before cutting once.
Planning Your DIY Wood Shelving Project
Start by thinking about what kind of shelving you need. For example, you might need display shelves in your living room, or heavy-duty storage for your garage. Knowing the type of shelving you need before starting the project will help you shape your decisions around design, materials, and installation methods.
Make sure you take the time to figure out where the shelves will go, how much weight they need to support, and what kind of style fits the space. If you’re installing shelves in an older home or an uneven basement, factor in any irregularities in the wall or floor.
Sketch out your plan and record measurements carefully. Try to visualize how the shelving will function day to day. A little planning upfront can save hours of frustration down the line.
Choosing the Right Materials for Your Shelves
Keep in mind that the type of wood you use will affect the strength, appearance, and price of your DIY shelving. For indoor shelves, pine is a popular choice because it’s lightweight, inexpensive, and easy to work with. It takes paint and stain well, making it a good pick for floating shelves or decorative display units.
If you want a smoother finish for painting, poplar is another great choice. For basement or garage shelving, basic plywood or construction-grade lumber should do the trick. These choices are often more affordable and offer the strength needed for heavier storage.
Quick material tips:
- Check each board for warping or bowing
- Avoid overly knotty pieces if you’re painting
- Use thicker wood for longer shelves or heavier loads
Essential Tools for Building Wood Shelves
The good news is you don’t need a professional workshop to build great shelves. A few basic tools should get the job done. Here’s what you’ll need:
- A power drill for making pilot holes and screws
- A level to make sure shelves are straight and secure
- A measuring tape and pencil to mark lines and measurements before cutting
- Circular saw for straight cuts, or have a hardware store cut them for you
Other helpful tools include a stud finder for locating wall studs, a sander for smoothing edges, and clamps to hold wood in place while assembling. If you have access to a miter saw or pocket hole jig, those can make things easier, especially for more advanced shelving projects. Don’t forget safety gear like goggles and ear protection, especially when using power tools.
Measuring and Cutting Wood for Custom Shelving
Precise measurements are key to a clean, professional-looking result. Start by measuring the space where the shelf will go, then mark those dimensions clearly on your wood. Use a straightedge or square to make sure your lines are accurate before cutting.
If your wall has any unusual features like uneven plaster, molding, or outlets, make note of those in your measurements. You might need to notch or trim parts of the shelf to accommodate. When cutting, go slowly and let the blade do the work. Label each cut piece if you’re building multiple shelves or supports so you can keep track of what goes where when you’re assembling them.
Preparing Wood for Staining and Finishing
Before you start putting everything together, prep the wood for finishing. Sand all surfaces to smooth out rough edges and splinters. Start with a coarser grit, like 80 or 100, and finish with a finer grit, such as 220, for a smooth surface that’s ready to stain or paint. Wipe the boards down with a tack cloth or damp rag to remove any dust. This helps make sure the stain or paint adheres properly.
This is also a good time to apply wood filler if you want a seamless look, especially on softwoods like pine that may have knots. Allow everything to dry completely before moving on to the finishing stage.
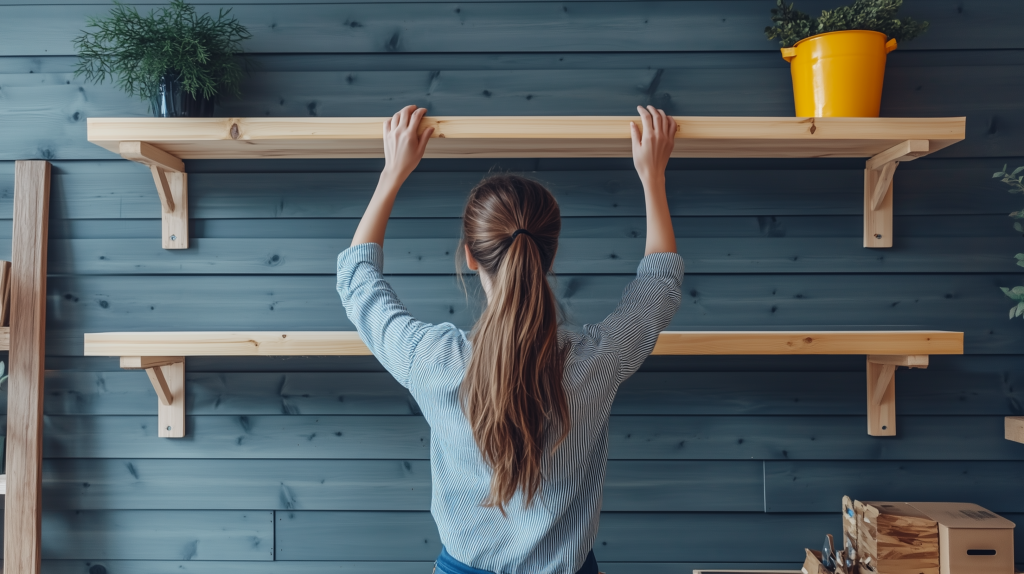
Installing Sturdy Shelf Brackets and Supports
Support systems vary depending on the type of shelf you’re building. For standard wall-mounted shelves, metal or wood brackets are a common and effective solution. They’re easy to install and come in many styles, from minimalist L brackets to decorative corbels. Be sure to anchor them into wall studs for maximum strength.
If you’re building floating shelves, you’ll need a bracket system designed to be hidden inside the wood. These kits often require drilling precise holes in the back of your shelf boards to insert steel rods or brackets. While this takes a little more planning and precision, the clean, bracket-free look is worth the effort.
When placing brackets:
- Keep them evenly spaced (about every 16 to 24 inches)
- Always use a level during installation
- Test anchor strength before placing anything on the shelf
Mounting Techniques for Different Wall Types
Not all walls are created equal. Drywall is the most common and easiest to work with, but it requires that you find and screw into wall studs to support any serious weight. If you’re working with brick, concrete, or tile, you’ll need specialized anchors and a hammer drill to bore pilot holes. These surfaces can be more challenging, but with the right tools and anchors, they can securely hold shelving.
Mounting tips by wall type:
- Drywall: Use a stud finder and lag screws
- Concrete or brick: Use masonry anchors and a hammer drill
- Tile: Drill slowly using a carbide or diamond bit with tape to prevent cracks
Reinforcing Shelves for Heavy Loads
Some shelving projects demand more than just aesthetic appeal. They need real strength. This is especially true for garages, utility rooms, or pantries where shelves might carry paint cans, tools, or bulk supplies. In these cases, reinforce shelves with additional supports, like vertical 2x4s or center brackets. Choose thicker boards that won’t bend under pressure, and keep bracket spacing tight.
To reinforce heavy-duty shelving:
- Add center or corner supports
- Use thicker or double-layered boards
- Secure all joints tightly and inspect regularly for shifting
Finishing Touches: Staining and Sealing Your Shelves
Staining and sealing your shelves not only enhances their look but also protects the wood from wear and moisture. Choose a stain that complements your room’s color scheme and wood grain. Apply it evenly with a brush or cloth, working with the grain. Allow it to penetrate for a few minutes before wiping off the excess.
Once the stain has dried, apply a clear polyurethane topcoat for protection. Use a water-based formula for low odor and easy cleanup, or an oil-based version for a more durable finish. Apply at least two coats, sanding lightly between each one. This step is especially important for shelves in kitchens, bathrooms, or basements where humidity can cause warping over time.
Styling and Organizing Your New Wood Shelves
Now that the hard work is done, it’s time to enjoy the results! Style your shelves based on their location and function. In a kitchen, you might use them to store dry goods in glass jars or stack everyday dishes. In a living room, try mixing books with decorative items like vases, frames, or plants.
Tips for great shelf styling;
- Mix different heights and materials
- Use containers and trays to group small items
- Leave open space to avoid visual clutter
Maintenance Tips for Long-Lasting Wood Shelving
Like any home feature, wood shelves benefit from occasional upkeep. Dust them regularly with a soft cloth to prevent buildup. Avoid placing wet items directly on the surface, and use coasters or liners when storing liquids. If your shelves start to show wear, a light standing and a fresh coat of sealant can restore their look.
Other maintenance tips:
- Tighten brackets annually to keep everything secure
- Monitor for moisture, especially in basements
- Touch up dings with wood filler and stain or paint
Troubleshooting Common DIY Shelving Issues
Even well-planned projects can run into hiccups. If your shelf ends up uneven, check the bracket alignment with a level and adjust as needed. For sagging boards, reinforce with a center support or adjust as needed. If screws won’t grip into the wall, you may have missed the stud. Use a stud finder and re-anchor the bracket.
DIY shelving is a learning experience, and small mistakes are part of the process. The good news is that most issues are fixable with a few tweaks. Take your time, make adjustments, and remember that even the pros had to start somewhere.
Building your own wood shelving is a practical and rewarding project that can completely transform a space. With a little planning, the right materials, and some patience, you’ll end up with a custom piece that serves your home well for years to come.
At Homeowner.org, we’re here to guide you along the way in your journey regarding all things related to buying, owning, and loving your home. Check out our site for more today.